- Introduction
- Converting an existing service connection
- Creating a new service connection
- Testing and conclusion
Introduction
Workload identity federation is a new feature in Entra ID that allows you to configure a workload identity in Entra ID to trust tokens from an external identity provider. In this blog post, I’m looking into how (and why) to use this feature with Azure DevOps service connections, which is a feature that was just announced to be generally available. If you need more information about workload identity federation in general, check out the Microsoft documentation. And if you need more information about workload identities in general, I highly recommend reading Thomas Naunheim’s series of blog posts on the topic.
Why use workload identity federation with Azure DevOps?
When you’re deploying resources into Azure from an Azure DevOps pipeline, you need to have a service connection to the target environment. Typically, the service connection is associated with a workload identity (service principal or managed identity) in Entra ID, which in turn needs to have the necessary Azure RBAC roles assignments to be able to make the changes to the target environment. The workload identities associated with the service connections are typically highly sensitive, because they need to have high privileges to the Azure resources. Earlier, this has posed some significant challenges:
- If you’re using a service principal, Azure DevOps needs to be able to authenticate as the service principal, using a client secret or a certificate. If you let Azure DevOps to decide, it will default to client secret, although certificate would be more secure. You also need to take care of managing the lifecycle of these secrets and/or certificates, which can be challenging if you have an Azure DevOps organization with dozens or hundreds of projects, each having their own service connections and associated service principals.
- The only way to use managed identities was to use self-hosted agents. Azure DevOps can leverage the managed identity of the resource where the agent is running on. For example, if you have an Azure virtual machine (or an on-premises server onboarded into Azure Arc) that is running your self-hosted agent, you can associate the service connection with the managed identity of the virtual machine (or Azure Arc server). However, you cannot use this approach with Microsoft-hosted agents. Also, if different development projects are sharing the same agent pools, then they would also be sharing the same managed identity to deploy the resources. In most cases you want different development teams to have dedicated workload identities associated with their own service connections, so that you can prevent the teams having privileges on each other’s resources. Whether you should share agent pools at all is another topic, but there are ways to do that securely, e.g. by using run-once container instances. That doesn’t resolve the issue with the shared managed identities though.
The promise of workload identity federation is that you can tackle both of these challenges:
- You no longer need to maintain secrets or certificates, because Entra ID will trust the tokens issued by Azure DevOps. The tokens will be issued with properties that tie them to the specific service connection in a specific Azure DevOps project in a specific Azure DevOps organization. You simply need to link the service principal with the service connection by adding federated credentials to the app registration associated with the service principal, and you’re good to go.
- You can also use federated credentials with user-assigned managed identities. While you’re not leveraging the typical benefit of managed identities in this case (= managing the credentials), the difference is that the federated credentials are managed through the Azure resource of the user-assigned managed identity, which means that you can delegate permissions to manage these credentials via Azure RBAC role assignments. Be careful though. Anyone with Contributor role to the managed identity can add federated credentials to it, which might be used by an adversary to move laterally or establish persistence.
Converting an existing service connection
If you have an existing service connection that is currently using certificates or secrets to authenticate, you can convert it to use workload identity federation instead. This is fairly straight forward, and because the workload identity used by the service connection will remain the same, you don’t need to change any of the permissions assigned to the workload identity. You just change the way it authenticates.
Service principals that have been automatically created
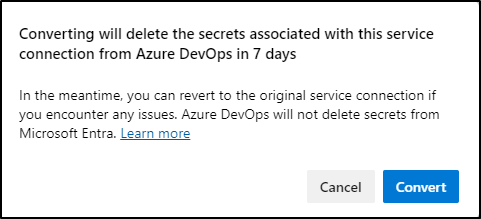
If you’ve originally created the service connection using the Service principal (automatic) option, then this is very straight forward. When you open the service connection, there is now an option to convert the service connection to use federated authentication, as shown in the picture below.

Clicking the Convert button will create the federated credentials for the workload identity, and after 7 days the original credentials will be removed from Azure DevOps. Note, that you still need to manually remove the secrets from the Entra ID app registration. But before doing that, make sure the federated credentials are working.
After the conversion, you can see that federated credentials have been added to the app registration associated with the service principal:
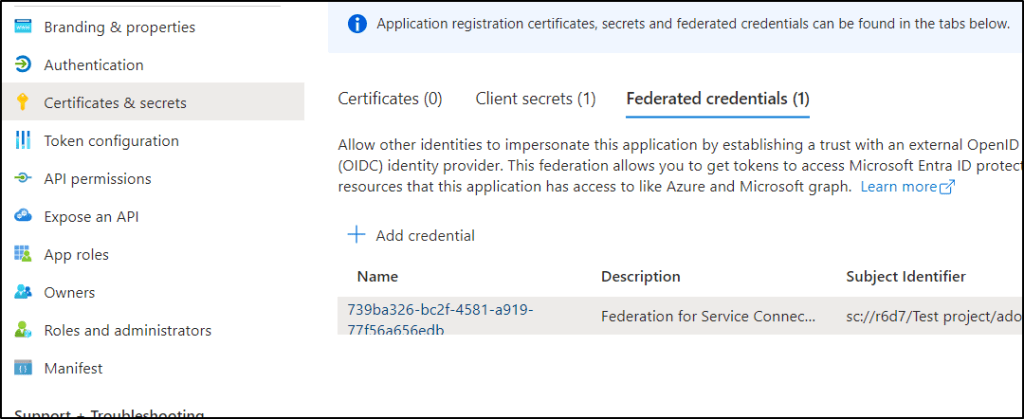
Once you’ve tested that the federated credentials work, remember to remove the secrets from the Entra ID app registration.
Service principals that have been manually created
If you’ve originally created the service connection using the Service principal (manual) option, then you have to do a bit more manual work here as well. But it’s still fairly straight forward.
You can see the difference, when you open the service connection in Azure DevOps. In this case, it shows you that you have to manually add the federated credential to the app registration.

To add the federated credential, you need the following information:
- Organization name: this is the name of your ADO organization. You can see it in the URL, when you’ve logged into the organization:

- Organization id: this needs to be in GUID format. One way to find it is to browse the marketplace for extensions. You can see the organization id in the URL:

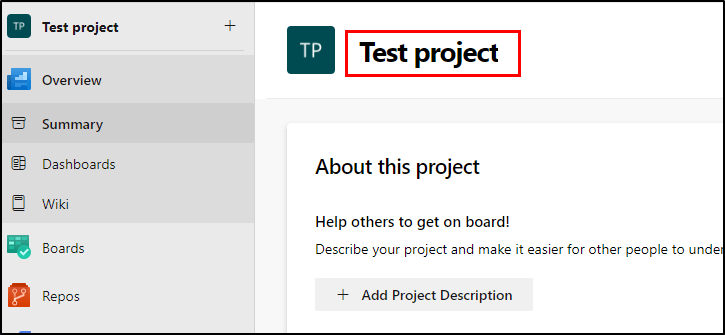
- Project: name of your ADO project:
- Service connection name: name of the service connection you’re about to update

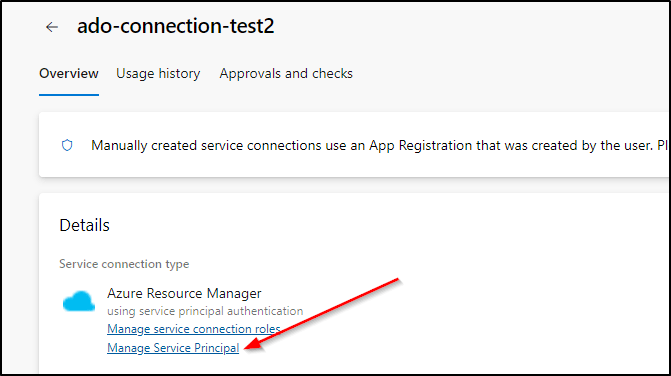
Once you’ve collected the information, you need to go to the app registration associated with the service connection. The easiest way is to use the link in the service connection configuration page. Note, that the link says Manage Service Principal, but actually takes you to the app registration, not the associated service principal.
Under Certificates & secrets, click Add credential.
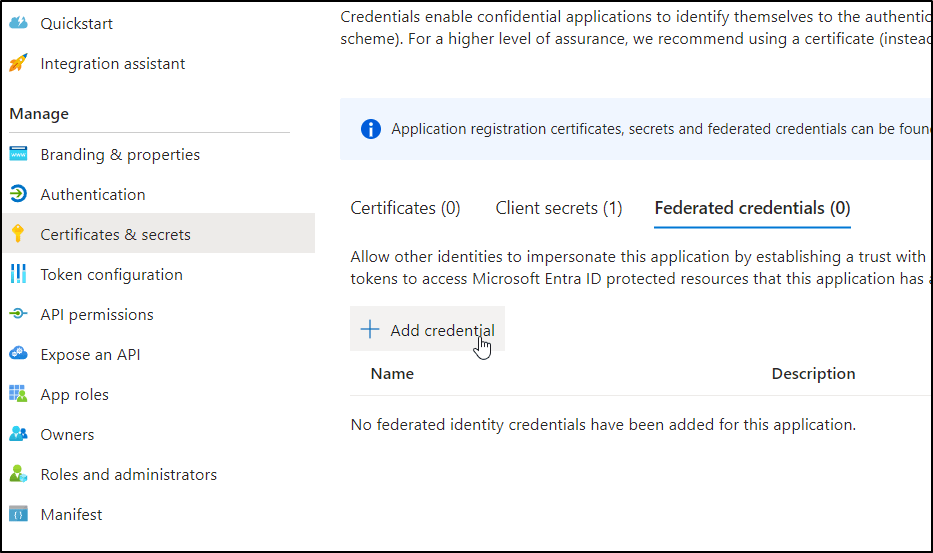
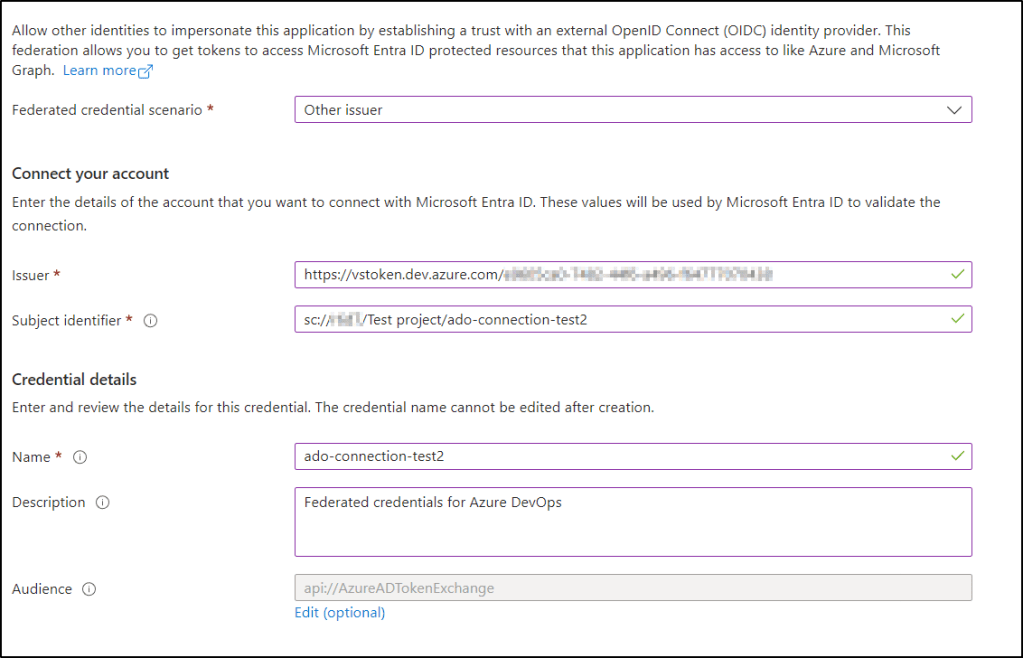
Add the required information collected earlier:
- Federated identity scenario: choose Other issuer
- Issuer: https://vstoken.dev.azure.com/<organization id>
- Subject identifier: sc://<organization name>/<project name>/<service connection name>
- Name: name for the credentials
Once you’ve added the credentials, you can go back to the service connection configuration page, and click Convert to finalize the configuration.

Again, that after you’ve verified that the new federated authentication works, you should go back and remove any earlier credentials (secrets/certificates) from the app registration.
Creating a new service connection
You can create new service connections with workload identity federation either automatically or manually (just as with service principals).
Creating new service connection (automatic)
As you would expect, using the automatic approach is very straight forward. You just create a new service connection for Azure Resource Manager, and select Workload Identity federation (automatic) as the authentication method.

You need to select the scope and name for the service connection. Note! This will add Owner RBAC assignment for the workload identity to the chosen scope. If you use this method, I highly recommend removing the role assignment manually, and adding only the required role assignments for the service principal. Otherwise, you easily end up with service connections that have way too much privileges.
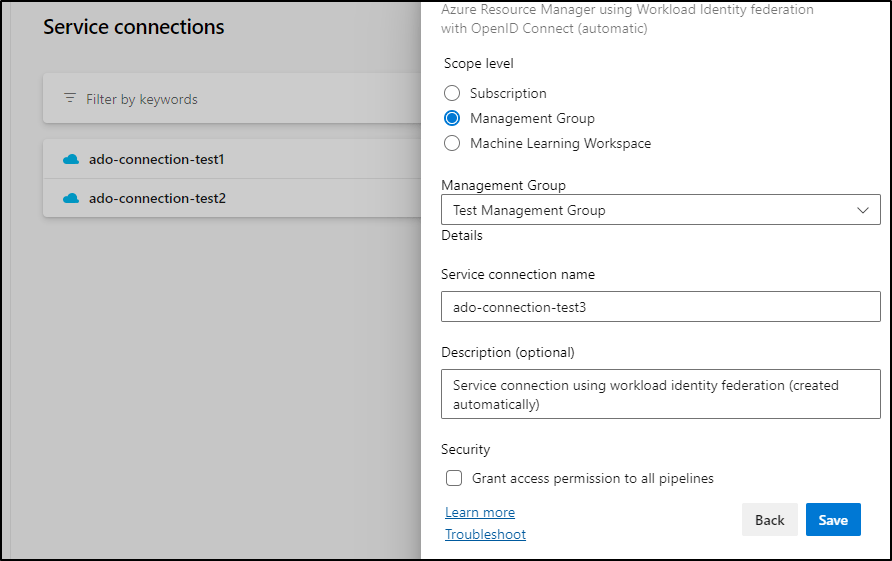
Another annoying thing with the automatic approach is, that the display name of the service principal (and app registration) is based on the organization name, project name and scope (e.g. management group or subscription). As result, you may end up with multiple service principals and app registrations with the same name, as seen in the picture below.

Luckily, you can change the name by opening the service principal (= Enterprise Application), and going to the Properties blade.

That’s really all there is to it!
Creating new service connection (manual)
Instead of using the automatic way, you can also manually create the workload identity first, and associate it with a service connection afterwards. You can either do this by creating an app registration (which also creates a service principal), or you can use managed identities. In this example I’m using managed identities, because as mentioned in the introduction, it has not been previously possible to use managed identities with service connections, except when using self-hosted agents. And if you skipped the introduction: be careful with delegating permissions to these managed identities.
Let’s start by creating the (user-assigned) managed identity:
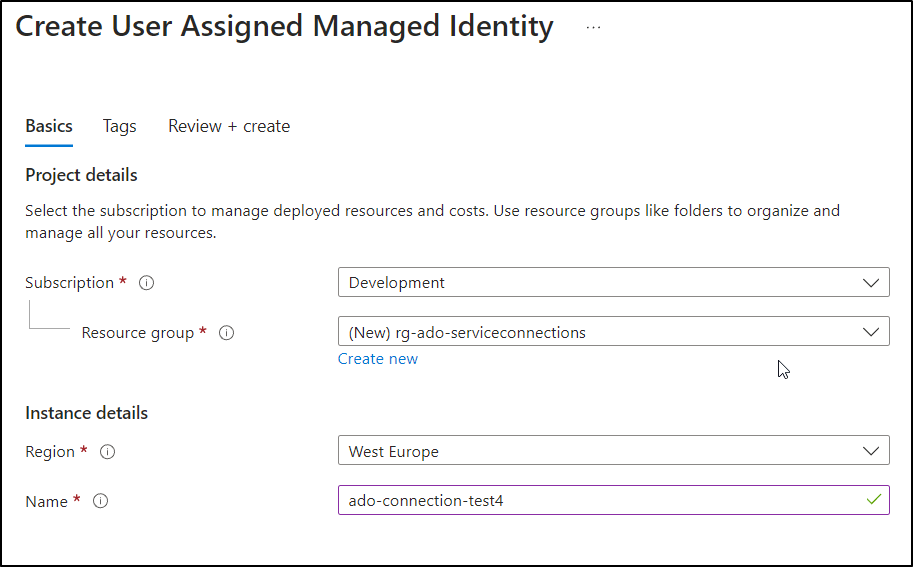
Once you’ve created it, you need to assign the required RBAC permissions to it. Again, grant only the permissions required by this specific project and this specific service connection. However, you do need to grant at least Reader role to the subscription or management group that you specify later on when creating the service connection.
The next step is to create a new service connection with Workload Identity federation (manual) and give it a name.

After you’ve given a name for your service connection, you’ll see a the following screen displaying the issuer and subject identifier information that you need to use when adding the federated credentials.
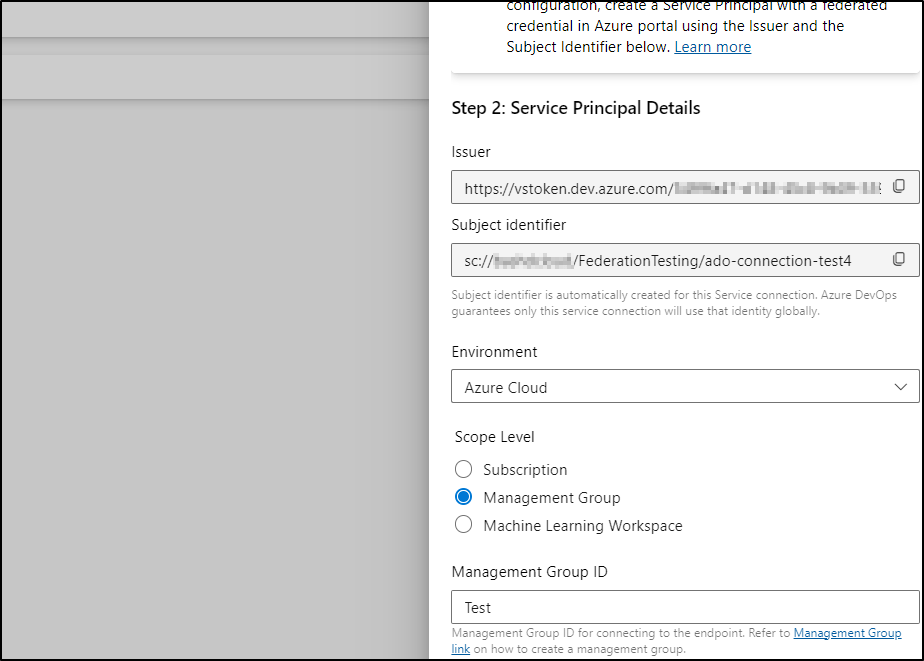
Add new federated credentials to the managed identity:

Again, use the Other option on the Federated credential scenario drop-down. Then just copy-paste the information from the wizard to the Issuer URL and Subject identifier.

Take the client ID of the managed identity (and your tenant ID).
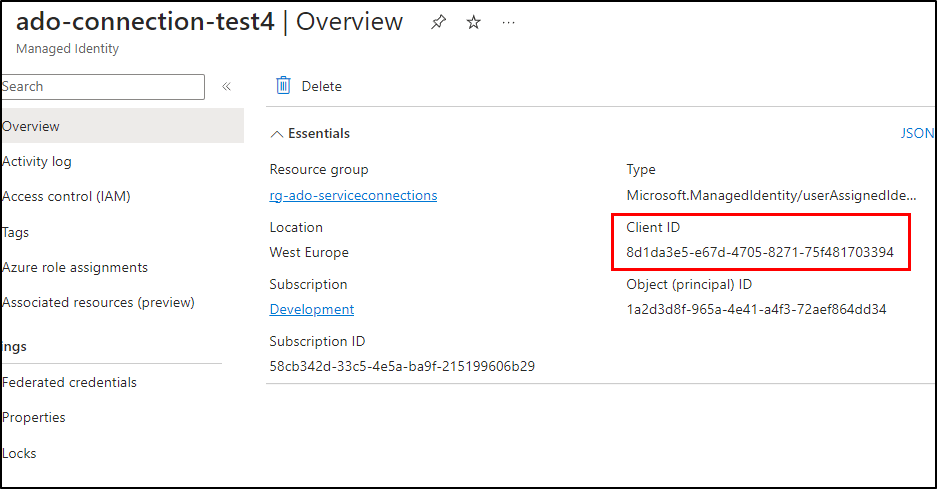
And add them to the wizard (again, it’s confusing that it says Service Principal Id):

Click Verify and save. And you’re done!
Testing and conclusion
Let’s do some testing. I’ll start by creating a very simple pipeline with the following definition, just to ensure we can connect to Azure Resource Manager using the newly created service connection (in this case I’m using the one I created using a managed identity).
The definition looks like this:
trigger: none

pool:
  vmImage: ubuntu-latest

parameters:
  # Service connection that is used for connecting to ARM
- name: serviceConnection
  displayName: 'Service connection name'
  type: string
  default: 'ado-connection-test4'

steps:
- task: AzureCLI@2
  displayName: 'Run script'
  condition: succeeded()
  inputs:
    azureSubscription: ${{ parameters.serviceConnection }}
    scriptType: pscore
    scriptLocation: inlineScript
    workingDirectory: $(Build.SourcesDirectory)
    inlineScript: |
      Write-Host "Let's get an access token!"
      az account get-access-token --resource-type arm
When I run the pipeline, I can see that that the Azure CLI is indeed using federated credentials:

The sign-ins are also logged into AADManagedIdentitySigninLongs category in Entra ID. However, there’s no information about the credential type here.

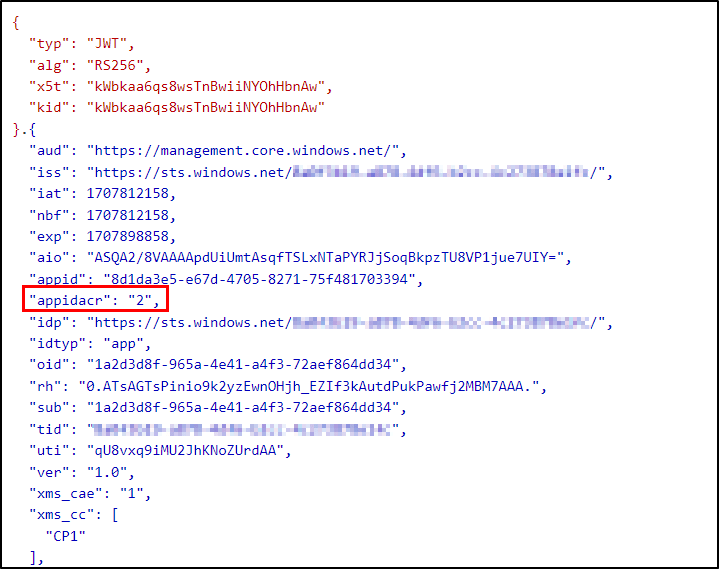
The access token shows client certificate as the authentication (appidacr: 2), so we don’t really see any indication of workload federated authentication here either.
Overall, workload identity federation is a great new feature, as you no longer need to maintain secrets or certificates for your Azure DevOps service connections. For obvious reasons, you still need to be careful about delegating access to the service principals (or managed identities) used by the service connections. But this is no different from what is was before.
